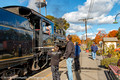
The railroad is the brain child of John Cavanna, who is one of the nicest people you could meet. The same goes for his crew. They were very accommodating and willing to help out whoever needed it. The parking lot is dirt but still easily passible. If you have mobility issues I would probably park closer to the walkway and proceed gently. There is a downhill slope to the farm, its gradual but still there.
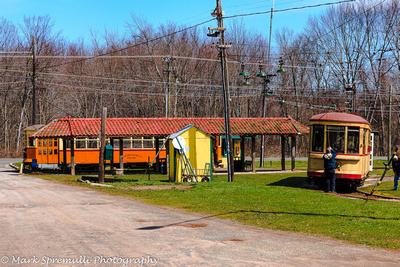
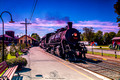
When you get down to the station, they have a little white building that is decorated with Autumn decorations and they are selling apples, cider and candy apples. That is also where you board the train.
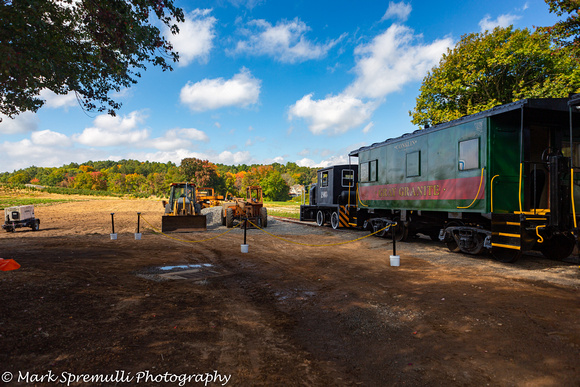
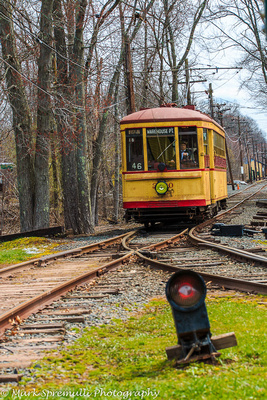
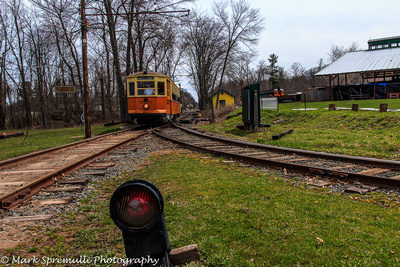
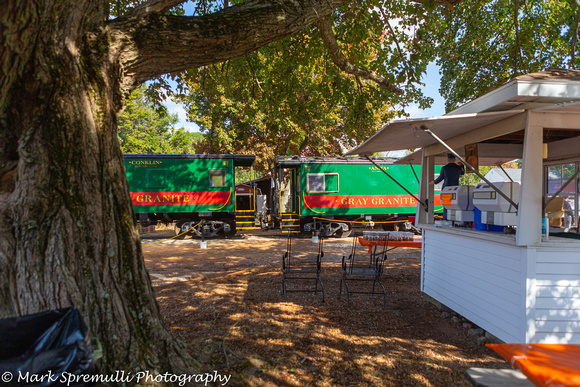 Waiting area and ShackWhere you wait for the train and board and the shack where you buy tickets
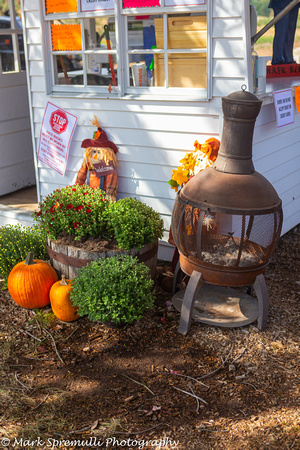 DecorationsSome Autumn Decorations to get one in the mood
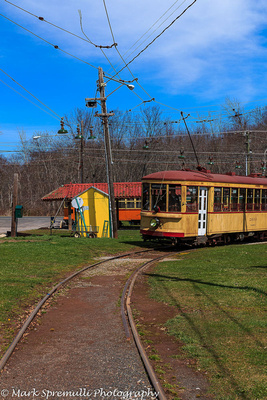
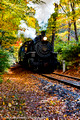
Once you buy your ticket and get on board the train leaves and brings you to the Pumpkin Patch. You get out and can view a waterfall and pond and pick your pumpkin. You can wait till the train comes back or board the train immediately for your return.
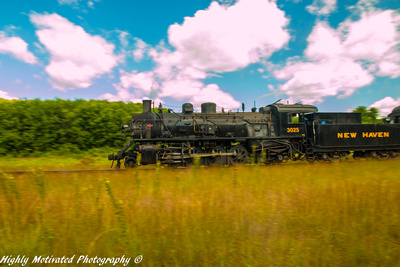
While you are riding the train you pass the Christmas tree area. They are planning on having a Christmas train this year with a steam engine, with a visit to the North Pole.
In conclusion The Gray Granite Railroad is a nice little operation that shows lots of promise. The people are kindest as they can be and you really get the sense the railroad and the farm is truly a labor of love. I look forward to seeing what this railroad and fine people are going to accomplish in the future. The future is more track for a longer ride, full steam ahead.
Contact information
Cavanna's Farm https://www.facebook.com/cavannasfarm1903/
Gray Granite Railroad https://www.facebook.com/GGRR1903/
Address
80 Woodland Street
South Glastonbury, CT 06073
Phone Number: (860) 659-1856
Hours and Prices may change, please contact them to get the up to date information
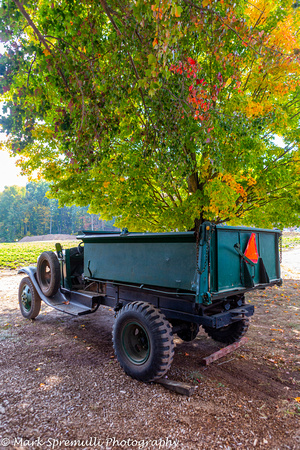 StationAn antique Truck at the station
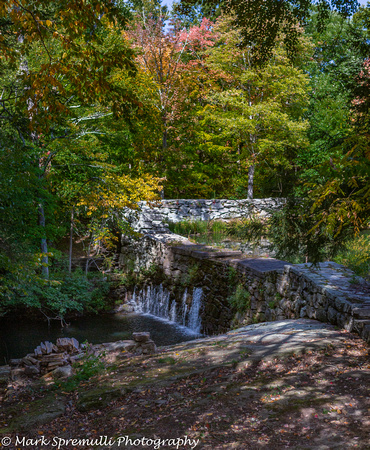 The waterfallThe Waterfall at the Pumpkin Patch
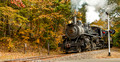
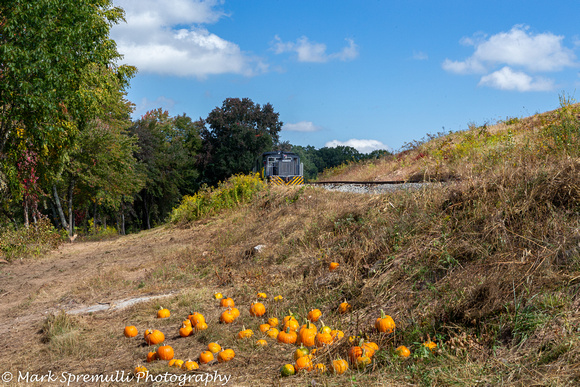 Pumpkin PatchThe end of the line... for now, The railroad is planned to go at least 3 miles in total
]]>

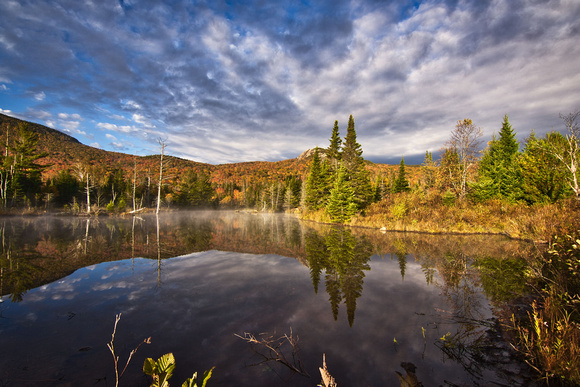
1. Stay local; Look, I, like the rest of us love to travel to different places during the foliage season. This year will be different because we don't know who has the virus and who doesn't. People can have the virus and be spreaders and show no symptoms. The risk is moderate but still there. I would say stay local. Just travel around your home state. For me that would be Rhode Island. Now Rhode Island does not the mountain ranges that the northern states have but they do have some hills and ledges that can be hiked. I am looking forward to exploring Northern Rhode Island this fall and keeping the Northern states till next year.
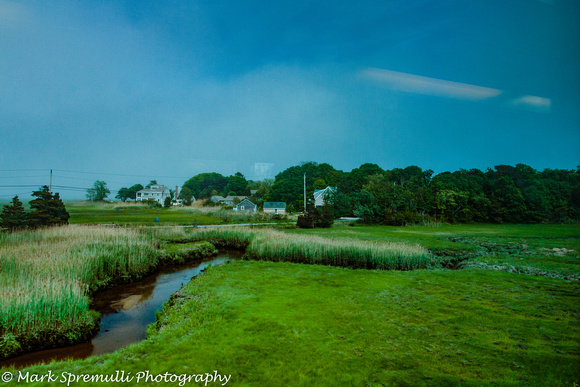
You can also look around the town you live in. See if there are any pockets of foliage near your house. This image was taken about 10-15 minutes from my house on a bike trail
 2. Day trips; If the reports are saying that the virus is under control and states have opened up more, I would still be leery. The Virus may be under control but it would still be out there. I would suggest Day trips. That way you can see something different but still sleep in your own bed at night. Day trips for me would be at the maximum, a three hour one way trip. From Rhode Island that would Conway, NH or Portland ME area. Also with a lot of people still out of work or just getting back to work, this will save money. The expenditures would be gas and possibly dinner, depending on how far you go.
3. Not just Foliage; the neat thing about the season is that Foliage is not the only subject that would make interesting photographs. Farm stands with the results of the harvest, scarecrows, pumpkin patches, Halloween decorations, even store windows would make interesting photos.
4. Eating; Eating in a restaurant is a personal choice. At this time, I would be comfortable but not everyone would. The best advice I could give is bring lunch with you and just go out for supper. That way you save money and limit your exposure.
These are are some thoughts I've had on the subject. They are my thoughts alone. Please observe the procedures set down in each state you visit. Wear a mask, stay six feet apart, wash your hands and I will see you out there during this Fall. We will get through this together. Just stay six feet away from me and wear a mask. ;)
]]>


Last time I wrote about how I go about eating on my photography excursions. Today I am going to go into a little more detail.
As with the previous post, Let's start with breakfast. As stated in the first blog I either eat a decent breakfast at home or I grab a snack and then have
breakfast out. When I have breakfast at home I usually have a breakfast sandwich with either an egg white or a full egg, with bacon bits and low sodium
american cheese. I like having them on a bagel so I have a little more in my stomach. With coffee and V8 this makes a quick, filling breakfast. I also cook
the egg the microwave, its quicker and a lot easier to clean up. Plus I can add the bacon bits right into the egg. I usually make the sandwiches myself
when I have time and I don't have a long drive ahead of me. When i do have a long drive ahead of me, I will go out to a sandwich place or a restaurant.
I don't get pancakes because the carbs will sit in your stomach and weigh you down. I usually get scrambled eggs, bacon, toast and home fries with
coffee. When I do this, I grab a Greek yogurt to tied me over till breakfast.
Now I am on the road. I will take some snacks along with me. Usually nuts, fruit or beef jerky. Now its time for lunch. My lunch is generally the same
every day. A sandwich, applesauce, Greek yogurt and sugar free pudding. I tend to drink flavored water, with a water bottle along to keep myself
hydrated. The sandwich I usually have is an Italian Grinder however there have been times I will switch to a Tuna sandwich. I store the food in a cooler
backpack that is kept in the car at all times.What I do is I bring it in to the house the night before and put in into the food into it and put that into the
refrigerator. Then I put the backpack back in the trunk. It keeps the food cold without ice till lunch. So after lunch I throw everything away and then I
only have the camera gear to bring in.
Last but not least is dinner. As I said before dinner is the only meal I eat out. It give a nice end to the day and it save me money by only buying one
meal. The meal is most of the time pizza. What can I say, its my favorite food.
I hope this gives you some insight on what my food situation is on the road. Maybe we will meet up down the road sometime and we can do lunch or
dinner.
Stay safe and Happy Photography
Mark Spremulli
]]>
Today I am going to talk about how I handle nourishment while out making photos. This will be a 2 part blog.
Let's start with the most important meal of the day Breakfast. I love breakfast, though the type I have depends on the situation I am starting my day.
If I am doing a sunrise shoot with the location not to far (at least an hour) from either my home or hotel, I will grab a quick snack before heading out and
getting my shots. I will usually award myself with a hearty breakfast at a local restaurant near the shoot location. The reason I grab a snack before I
leave is I am diabetic and going that long with out food could cause my sugar to drop. As stated I reward myself with a nice breakfast as a way of
celebrating me getting up early to get the sunrise. If i am local (10-15 minutes) I will either pick up breakfast on the way home or make it there. The
other time I have breakfast out is when I am traveling to say North Conway for a train chase. That is to far to wait to have breakfast, so I will grab
breakfast out before I get on the road, usually a breakfast sandwich, hashbrowns, and coffee, or I make a sandwich at home for a quick bite.
Now we move on to the second meal of the day Lunch. In all of my photo trips, nine times out of ten I will bring lunch I pack from home. There are
several reasons why. The first one is I am cheap and It's cheaper to bring a lunch from home then having to buy one out. The second reason is I don't
want to take time away from photography to eat. With a lunch with me I can eat whenever I get hungry. Also if I am in a location that is off the beaten
path then I don't have to take up time trying to find a restaurant. The third reason is I am trying to eat healthier and buy making a lunch and bringing
it with me I know what I am bringing and what is going into my body.
The third meal of the day is dinner. Dinner is probably the only meal when I am out on a photo trip that I eat out. It is to much work to bring a
separate container for dinner. Also I am generally going home after dinner so it's a nice way to cap off the day. Plus I get to save a little money with
just buying dinner.
That is it for today. Next week I will go into a little more details on to what I eat and How I hold it.
Take Care
Mark
]]>
As a photographer, I love taking my camera(s) and photographing the world around me. I usually take my Canon 6d and/or 7d, depending on what I am photographing. I also usually take several lenses and a tripod or 2 with me. Filters, cleaning supplies, flashes, batteries, and memory cards are also in my bag. This adds up to quite a heavy bag. Now I am planning on switching to mirrorless this year ( A blog post next Saturday will discuss this), however sometimes like today I was going out and I didn't feel like taking all my gear with me. What to do? Do I just use my smartphone? It has a great camera however I am working on loosing weight and I wanted to use the phone to count my steps and measure how many calories I burned. I opted to use another tool in my arsenal.
The other tool is the Pentax X-5 Camera. Its a 16mp bridge camera covers all of my photographic needs when I want to travel light. With all the built in presets this camera has it has no trouble adapting to any situation that I found myself in today. The lens goes from 4mm to 104mm. More than enough to shoot birds or anything from a distance. The camera is powered my 4 AA batteries, which certainly makes it easier to carry around sometimes. It has sensor shake reduction and the camera even has some manual control. For days like today, when I needed to get out and get some fresh air and wanted to get some snaps. This camera fit the bill.
Here are some photos from the hike today.


 ]]>
]]>
 ]]>
]]>


 ]]>
]]>


 ]]>
]]>
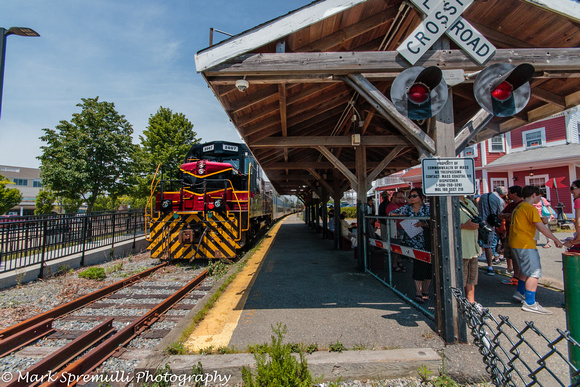
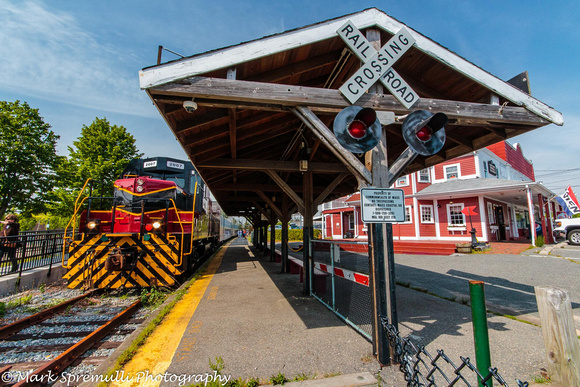
https://www.capetrain.com/
Hyannis Depot: 252 Main Street, Hyannis MA
]]>Tip 1. DO NOT USE FLASH. There is nothing more annoying then trying to be spiritual and meditative, and having the flash go off everytime someone takes a shot. A better option is too invest in a fast lens such as a 70-200 F 2.8 or a 24-70 F 2.8 or even a prime such as the 50 mm F 1.8. If you have a crop sensor camera, an Sigma 50-150 F 2.8 or a 17-50 F 2.8 or the newer 18-35 F 1.8 or the Sigma 50-100 F 1.8. Shots such as these were taken with the 50-150
Tip 2. Raise your ISO. Sometimes you need to set your ISO to higher settings so you can get a faster shutter speed. Ideally it should be above 1/125 of a second. However there is a rule of photography that helps with this, it is the reciprocal rule which means you aperture should be equal or more then the maximum aperture of your lens. For example if your lens is a 150 mm your aperture should be 150 or more to get a sharp shot. However the higher ISO will induce noise into your photos so be careful. An High ISO was used to take this shot
Tip 3. Put your camera on Silent Mode. Most current digital cameras today have a silent mode in their drive features. It does dampen the sound of the shutter but it does sometimes make the camera shoot slower. Just something to keep in mind
]]>
 ]]>
]]>
 I apologize for last week missing the blog, I was very sick this past weekend and all I did was sleep.
I didn't do much shooting these last couple of weeks but I did some. All of these shots were processes by the Nik Software that is now free from Google. I hope you enjoy.
]]>
 station morningthe shot is ok, shooting into the sun does put the front of the engine and cars in shadow
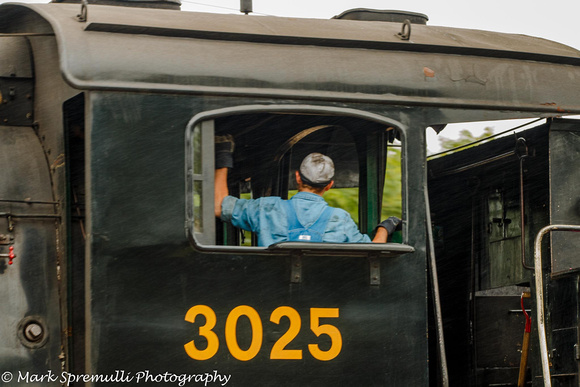
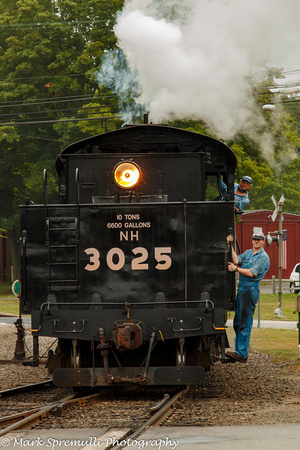
 At the Station3025 waits patiently for the 10:30 departure
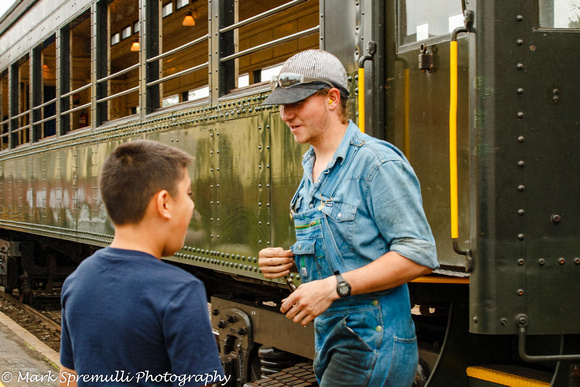
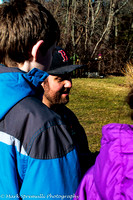
 Old and NewFather and son first glimpse of a steam engine together with fall trees in the background
When you are chasing the train, it is good practice to let the railroad know by telling the office personnel and the train crew where you will be and what you'll be doing. They don't want to have surprises out on the line that could potentially ruin everyone's day. Since the line runs North you will be shooting into the sun with the engine running front first from Essex, so getting the correct exposure would be tough, I've found that on a sunny day I will try to get to some of the locations on the line that run through woods, thus softening the harsh light. As an aside cloudy days make this railroad much easier to shoot.
Old and NewFather and son first glimpse of a steam engine together with fall trees in the background
When you are chasing the train, it is good practice to let the railroad know by telling the office personnel and the train crew where you will be and what you'll be doing. They don't want to have surprises out on the line that could potentially ruin everyone's day. Since the line runs North you will be shooting into the sun with the engine running front first from Essex, so getting the correct exposure would be tough, I've found that on a sunny day I will try to get to some of the locations on the line that run through woods, thus softening the harsh light. As an aside cloudy days make this railroad much easier to shoot.
 Thought the woodsThis was taken at the road that goes down the the Chester ferry, park along the shoulder as the road behind this area is really a driveway.
 At the crossing40 blows for the Old Deep River Road Crossing, the second major crossing on the route.
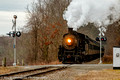 Essex Street Crossing3025 is approaching Essex Street in this late December 2015 view
For you night shooters, the railroad only operates at night during December, when their Christmas trains run. They have gotten so busy during this time that they run two trains providing shots like this
Essex Street Crossing3025 is approaching Essex Street in this late December 2015 view
For you night shooters, the railroad only operates at night during December, when their Christmas trains run. They have gotten so busy during this time that they run two trains providing shots like this
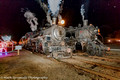 sisters at Deep River40 and 3025 meet at Deep River aka The North Pole during December.
This railroad is definitely a great place to visit, with good people, equipment and multiple opportunities to photography trains in a beautiful New England setting. Hopefully I will see you trackside.
sisters at Deep River40 and 3025 meet at Deep River aka The North Pole during December.
This railroad is definitely a great place to visit, with good people, equipment and multiple opportunities to photography trains in a beautiful New England setting. Hopefully I will see you trackside.
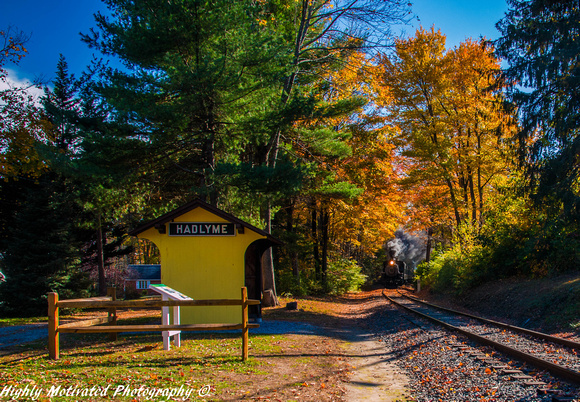
Essex Steam Train
]]>RANT
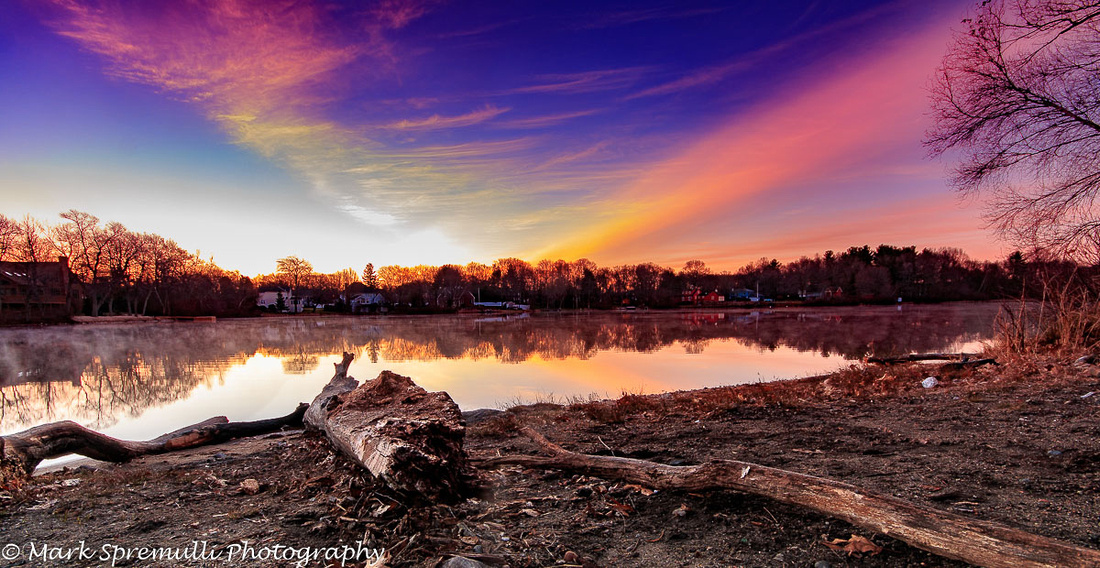
I arrived there around 5:47 am. I like to get to places early so I can be set up and ready when the show starts. However I was delayed by the fact that someone decided to have a party there previously and didn't clean up after themselves. I had to remove several items of trash so my composition could be litter free. This is just a reminder to always check over your site before you set up a shot and to my readers who aren't photographers, please pick up after yourself.
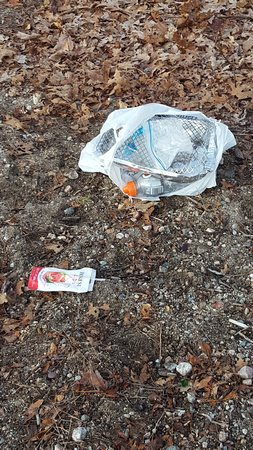 Trash Had to remove this before I set up the shot.


took part in the tour.
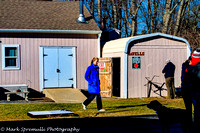 the sugaring house and shopWhat you see when you walk up to the house
The first demonstration you saw was a interactive one where visitors could practice tapping a maple tree.
 showing a new generatondemonstration of tapping
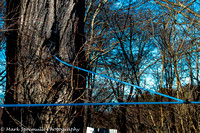
It was great to see how they set up the the bags and how they transport the sap to the sugaring house. As well as showing the different tap sizes.
showing a new generatondemonstration of tapping
It was great to see how they set up the the bags and how they transport the sap to the sugaring house. As well as showing the different tap sizes.
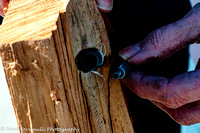 tap demonstrationshowing the difference between the old and new tap size.
and also the bags they use to collect the sap
tap demonstrationshowing the difference between the old and new tap size.
and also the bags they use to collect the sap
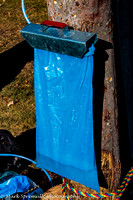 Sap collection bag
as well as the transportation to the sugar house from their offsite trees.
Sap collection bag
as well as the transportation to the sugar house from their offsite trees.
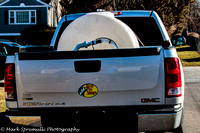 sap-mobile
After that we went to see the trees they have tapped on the property
 how they collect sap
and to see the sap in its native form.
how they collect sap
and to see the sap in its native form.
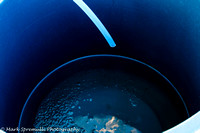 the sap in the bucket
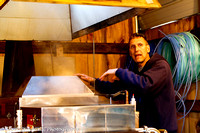
And yes I tasted the sap and it tasted like sweet water ;) After that we were led to the sugaring house where the sap is boiled down to make maple syrup. It was obvious the way the boiler was talking he truly loved what he did, his eagerness was infectious.
 Demonstrating how they make syrup
The Boiler was pretty cool too
Demonstrating how they make syrup
The Boiler was pretty cool too
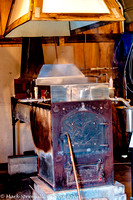 the boiler
The site of all the syrups was making me hungry
the boiler
The site of all the syrups was making me hungry
 The grades of syrup
. I learned so much about New England history and nutrition
The grades of syrup
. I learned so much about New England history and nutrition
 chart showing how healthy maple syrup is
. I learned enough about maple syrup and New England to fill several blog posts. I strongly encourage anyone to go visit them and buy some of their products. They are truly wonderful people and it will time will spent.
chart showing how healthy maple syrup is
. I learned enough about maple syrup and New England to fill several blog posts. I strongly encourage anyone to go visit them and buy some of their products. They are truly wonderful people and it will time will spent.
Davell's Maple Farm
30 Orchard Drive
North Attleboro, MA 02760
www.davellsfarm.com
Adult tour $7
]]>
 ]]>
]]>In part 1 of the blog http://markspremulli.zenfolio.com/blog/2015/2/ride-the-rails-for-photography. I gave some insight as to what gear I use and techniques. In this follow up blog I will talk about the rest of the formula, namely safety and clothing.
Clothing:
For Railroad photography I generally wear bright colors such as reds, whites and orange. You want the train crews to quickly be able to see you. So save your camo gear for when you're doing wildlife photography. I would also recommend some good comfortable shoes. I would stay away from flip flogs and sandles as they don't support your feet during the time your out shooting, and it may be necessary for you to hike out a long distance to get the location you want to shoot from. As for pants I would say a good pair of ripstop slacks such as http://www.wrangler.com/store/WRG_STORE_US/en_US/style/3w060.html. These are the slacks I use and I love them. Comfortable plenty of pockets and I don't have too worry about ripping them while moving through undergrowth to get trackside. A ball cap or any brimmed hat will be effective in blocking the sun from your eyes.
Safety:
The most important aspect of railroad photography is safety. A whole blog could be written about the subject. For now I will offer some pointers. One of the most important things is not to get too close to the tracks. Not only does this make train crews nervous it is a danger area for you to be in . A good rule of thumb is to remember that most tracks have 50 feet on either side of them as railroad property. Stay beyond tat and you should be fine. Another point is at no time should have anything blocking your senses, such as headphones and/or cell phones. Keep alert at all times. A third point is always have an escape plan in case something happens, GET OUT OF THERE! Also if you can communicate with the railroad office and/or train crews to let them know you will be out on the line. Finally DO NOT work on the tracks unless their is no other way to get to your photo location and if you have to walk next to them and quickly and keep alert and know the train schedules. I hope you have enjoyed my blog post and I hope to see you trackside.
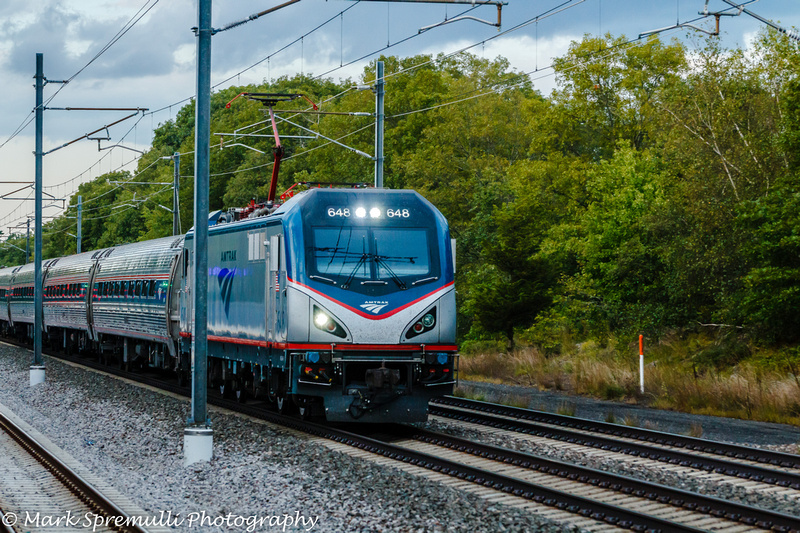
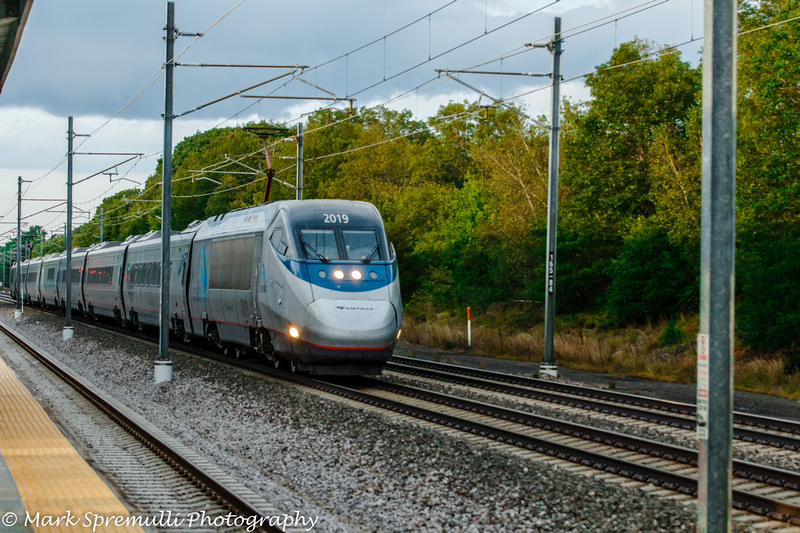
]]>Equipment: My main camera is the Canon EOS 70D. It's an 20 megapixel APS-C 7 fps camera. I like a crop sensor for railroad photography for several reasons. The first one is the 1.6 crop sensor allows me to get closer to the trains without having to physically get closer to the trains thus allowing me a higher margin of safety, plus the train crews would most likely appreciate not having an annoying photographer standing too close the tracks giving them gray hairs in the process.
Another reason why I like the 70D for railroad photography is that the speed of the camera allows me to capture panning shots with a added benefit of one of them being usable.
The final reason I love a crop sensor is that it allows me to stay on private property and still get the photo without trespassing on railroad property.
 PalmerNew England Central Train photographed from the station in Palmer MA
For lenses I use a Sigma 17-70 F2.8. It's small, very light, tack sharp and with a center sharpness I can crop pictures if I need to. For Distance shots I would use a 70-200 F2.8, when I purchase one.
If I am chasing trains and photographing them, I don't use a tripod with today's high ISO standards you don't need one and it adds to the pleasure of not having to carry one around if you have to hike out to get to your shooting location. I always carry one hot shoe flash with me just in case I need it for fill light.
Next month in Part 2 I will share what clothes I wear for railfan photography and how I do it safely
]]>